Tips/Tricks
We strive to provide the best services to all our customers. Sometimes, despite all the video tutorials on YouTube, one can still get stuck. Here, we will try to explain the basics of drone building, from assembly, basic setup, and troubleshooting (additional information will be added gradually).
FPV Drone Won't Connect to PC:
Many of you might have faced the issue where the drone, or copter, you want to set up on the PC using the Betaflight, Emuflight, Inav configurator, etc., doesn’t connect, even though all drivers are installed. It seems as though the drone isn’t connected at all. The first possibility is that you're using a non-data cable – just a charging cable, which does not have data transfer capabilities. In this case, try a different USB cable. If that doesn’t help, the issue might be with the drivers, which may be installed but not correctly assigned by the operating system. We can fix this using software that can resolve this issue. The program is called Immpulse Driver Fixer.
You can download it HERE
The program does not require installation, and once you launch it, it will automatically begin searching for connected flight controllers (FC). That means you must have your drone connected to the PC via a data cable before running the program. The program will fix the driver assignment issue in the operating system and put the unit into DFU mode, which is intended for flashing the firmware (upgrading) of the unit’s processor. After that, simply disconnect and reconnect the unit to the PC via USB to exit DFU mode. The port number will then appear in the configurator, allowing you to connect to the drone.
Basic Setup of an FPV Drone:
Betaflight is a popular open-source firmware and configuration tool for FPV copters. The following guide describes how to set up an FPV drone in the Betaflight configurator.
Preparation:
- Download and install the Betaflight Configurator from GitHub for your operating system.
- Ensure that your drone is turned off and that all propellers are removed.
- Prepare a USB cable to connect the drone to your computer.
Connecting the Drone:
- Connect the drone to your computer via USB.
- Open the Betaflight Configurator and click “Connect”. The drone should connect automatically.
To set up the gyroscope position on your FPV drone in the Betaflight configurator, follow these steps:
- In the menu, select the "Setup" tab and then "Calibration".
- Select "Accelerometer" and place the drone on a flat surface for calibration.
- Click on the "Calibrate Accelerometer" button and follow the instructions.
- Once the gyroscope calibration is complete, switch to the "Configuration" tab.
- Find the "Gyroscope" section and ensure that the gyroscope axes (Yaw, Pitch, Roll) are correctly set.
- If necessary, you can also calibrate the compass in the "Compass" section.
Setting Ports:
Ports Tab:
- Set the UART port where your receiver is connected (e.g., UART3) and enable "Serial RX".
- Set the UART port for telemetry if used (e.g., UART6) and enable the corresponding peripheral (e.g., "TBS SmartAudio" or "IRC Tramp").
- Click on "Save and Reboot".
Setting the Receiver:
Configuration Tab:
- In the "Receiver" section, set "Serial-based receiver" and choose the type that matches your receiver (e.g., "SBUS" or "CRSF").
- Click on "Save and Reboot".
Receiver Tab:
- Ensure the controller is connected and properly controlling the channels (Throttle, Roll, Pitch, Yaw).
- If needed, change the "Channel Map" or "RC Interpolation".
- Click on "Save".
Setting Flight Modes and Switches:
Modes Tab:
- Add flight modes (e.g., "ANGLE", "HORIZON", "ACRO") and assign them to switches on the controller.
- Add additional functions like "ARM", "BEEPER", or "FLIP OVER AFTER CRASH" and assign them to switches.
- Click on "Save".
PID and Filtering Settings:
PID Tuning Tab:
- Set the P, I, and D values for Roll, Pitch, and Yaw based on the manufacturer’s recommendations (you can leave the default values at first) or according to your own experience.
- In the "Filter Settings" section, set the filters based on the manufacturer’s recommendations or your own experience.
- Click on "Save".
OSD (On-Screen Display) Setup:
OSD Tab:
- Enable and adjust the position of various OSD elements according to your preferences (e.g., battery, RSSI, flight time, etc.).
- Click on "Save".
Check and Test the Drone:
- Disconnect the drone from the computer.
- Connect the battery to the drone and verify that all systems are working correctly.
- Perform a test flight and fine-tune the PID and filters as needed.
RPM Filters and Their Setup on ESCs with BlHeli_s:
If you want to improve the flight characteristics of your FPV drone and you are using more affordable ESCs with BlHeli_s, there is the option to flash the ESC with firmware that enables RPM filtering in the Betaflight configurator and other configurators.
You can use the online configurator here: https://esc-configurator.com/
The connection to the copter works the same as with other program versions, meaning you can only connect to the configurator with the drone powered up and the battery connected via USB to the FC board. Choose the correct port (COM), usually labeled as Betaflight, and click connect. After connecting, press the READ SETTINGS button. You will see the settings of each ESC (for 4-in-1 ESCs, there are 4 entries). Click FLASH ALL, select BLUEJAY as the FW version, the protocol type will be filled automatically, select the latest FW version, and choose the PWM motor frequency (24kHz for racing, 48kHz for freestyle and cinematic drones, and 96kHz for whoops). Confirm the FW flash with the FLASH command, and the update process will be displayed in real-time on the screen. Once completed, you can disconnect the drone from the configurator by clicking DISCONNECT.
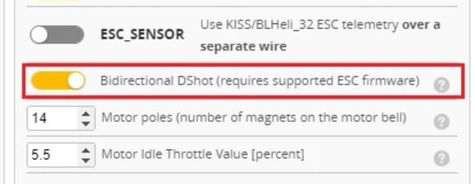
Now you can connect the Betaflight configurator, where in the MOTORS tab, select Bidirectional Dshot as the active option. To ensure proper RPM filtering, input the correct number of motor magnets and confirm with Save and Reboot. RPM filtering is now enabled. After updating the firmware, the ESC startup tone will also change when the drone battery is connected.

The basic condition for the safe behavior of the drone and its smooth flight performance is following the correct assembly procedures for each component individually.
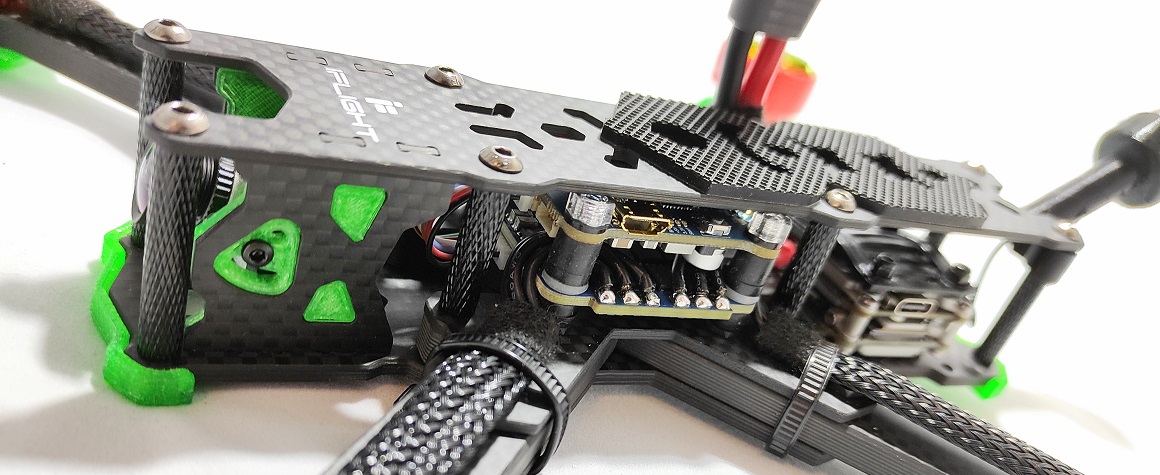
Vibrations are a real issue due to more powerful motors, faster PID algorithms, and the sampling frequency of the FC’s gyro. The main goal is to reduce the amount of mechanical noise from the motors entering the FC/gyro during flight, either by using the included mounting material in the FC package, such as softmount (rubber material), or another type.
Types of FC/ESC Softmounts:
- Anti-vibration standoffs M2/M3
- 3D printed TPU mounts
- Silicone O-rings
- Grommets (reduction from M3 to M2, etc.)
- Foam tape
Motor softmounts are not recommended. While this may partially solve the issue of vibration transmission from the motors to the frame, it creates a number of other issues.

-
Tuning PID values and filters for an FPV drone in Betaflight Configurator can be a challenging process, but with this basic guide, you can easily manage it. Follow these steps:
Preparation:
Make sure your drone is equipped with the latest version of Betaflight firmware.
Backup your current settings in the Betaflight configurator (CLI -> "diff all" -> copy and save the output).
Before starting tuning, make sure your drone is in good condition, all components are secured, and you have new propellers.
Step 1: Tuning Filters
- Connect your drone to the Betaflight configurator and go to the "PID Tuning" tab.
- In the "Filter Settings" section, set all filters to their default values or use the preset filters for your drone (if provided by the manufacturer).
- Perform a test flight and check for motor overheating. If the motors overheat, increase the filter values on the slider by one step and try again.
Step 2: Tuning PID Values
- In the "PID Tuning" tab, start tuning the P, I, and D values for each axis (Roll, Pitch, and Yaw) individually.
- Start with the P values. Increase the P values until you notice slight oscillation. Then, reduce the P values by 10-20% to ensure stability.
- Set the I values to be high enough to maintain the drone's orientation during maneuvers but not too high to cause over-rotation.
- Tuning the D values is crucial for effective damping of oscillations. Increase the D values until you achieve smooth flight (in turns) without oscillations. If the motors overheat, reduce the D values.
Step 3: Fine-Tuning
- After setting the basic PID values, perform additional test flights and check the drone’s behavior. If necessary, adjust the PID values to achieve optimal flight performance.
- Now you can proceed to fine-tuning the filters. If you are confident that your drone is flying well, gradually lower the filter values to increase performance and responsiveness. Be sure to regularly check the motor temperatures.
Step 4: Saving Settings
- After finishing the tuning and fine-tuning of PID values and filters, don't forget to save your settings in the Betaflight configurator.
- Perform a final test flight to ensure that your drone is flying as expected.
Important Notice:
Tuning PID values and filters is an advanced process and requires experience with FPV drones. If you're not experienced, it's recommended to consult with an expert. Improper procedures or incorrect settings can lead to damage to the drone's electronics or motors.


